Subscribe RSS

Wednesday

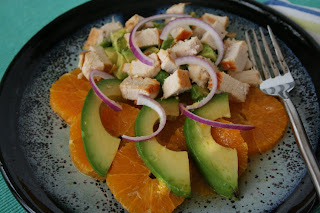
Orange and Avocado Chicken Salad

Has everybody noticed how super sweet and delicious oranges are right now?  Time to take advantage of them!  This recipe is a great flavor combo -- oranges, avocados, and chicken.  (I'll bet it would taste good with shrimp too, but you know me and shrimp :).  I clipped this recipe from a Sunset Magazine about 10 years ago -- it's quick and easy and won't heat up your kitchen at all if you grill the chicken or buy one at Costco.  I hope you'll like it as much as we do.

Orange and Avocado Chicken Salad

4 oranges (about 1/2 lb each)
3 firm-ripe avocados (about 1/2 lb each)
1/2 Cup orange juice
6 Tbsp lime juice
1 Tbsp chopped fresh dill or 1 tsp dried dill weed
1/2 tsp sugar
Salt to taste
2 Cups diced or sliced skinned cooked chicken or turkey breast (smoked is good too)
About 1/2 Cup very thinly sliced red onion

With a very sharp knife, cut peel and white membrane from oranges.  Thinly slice oranges crosswise.  Peel and pit 2 avocados.  Dice avocado and mix with 3 Tbsp orange juice, 2 Tbsp lime juice, dill, sugar, and salt to taste.  Mound chunked avocado equally on plates.  Top equally with chicken.  Peel and pit remaining avocado and thinly slice lengthwise.  Separate onion slices into rings.  Mix remaining orange juice and lime juice.  Arrange orange slices, avocado slices, and onion rings equally on plates, then moisten with orange-lime juice mixture.  Add salt to taste.  Makes 4 servings.


If you like, you can garnish this with dill sprigs and minced fresh jalapeno chili peppers.


Monday

Hot Fudge Sauce

I got this recipe from my friend Linda years ago when my kids were small.   It makes a quart of the best hot fudge sauce ever.  When you're done making it you just pour it into a quart jar, let it cool, and store it in your refrigerator until you need some.  Beware, though -- it may disappear right out of the quart jar while you're not looking.  It's so thick that you'll find the telltale spoon marks if there are chocolate snitchers at your house like there were at mine :).  When you want to use some on ice cream or over another dessert, just scoop out what you need, put it in a microwave safe bowl, and heat until it gets liquidy again -- easy!  If you want to keep some long-term (say you're making some for gifts), pour the hot fudge into cute little canning jars and put the lids on immediately.  As it cools, it will self-seal.  Who wouldn't love a jar of hot fudge? 

Hot Fudge Sauce
1/2 lb (2 sticks) butter or margarine
1/4 Cup unsweetened cocoa
dash salt
3 Cups granulated sugar
1 Cup evaporated milk (keep rest of can for adding later)

Melt butter.  Add rest of ingredients slowly.  Stir well.  Bring to a boil and boil until sugar is dissolved.  Take off heat and add rest of milk left in can.  Cool slightly.  Pour into blender and blend for about 1 minute.  Be sure you have your hand on top of the blender lid when you turn it on so you don't end up with chocolate sauce all over your kitchen!  Enjoy!


This is gluten free, dairy free ice cream -- amazing!  It's made by Rice Dream.  Ron said it tasted pretty good, but the chocolate sauce was better!


Saturday

Loaded Tacos

Our family loves tacos!  They're one of our favorite foods and this particular recipe makes them a complete meal in and of themselves.  If you love tacos and make them frequently, you may have used packaged spice mixes to jazz up the meat.  If you've had to go wheat free or have other allergies, you may not be able to use them anymore, so here's one you can use.  However, with these tacos, you can go as simple as just salt and pepper in the meat -- the rest of the ingredients add so much flavor that you don't really need spicy meat.  You choose.  Just an option.  I got the meat spice recipe when I was first married from the mother of my best friend, Lois Ann, which is kind of ironic, because when my family moved from California to Salt Lake the summer I was 9, I'm not sure Lois Ann's family had ever had tacos before.  I remember my mom throwing a huge neighborhood party shortly after we moved in which featured our favorite Mexican dishes.  It was so funny watching people who had never had tacos before trying to figure out how to eat them without losing all the filling!  I recall my dad giving a demonstration of the proper way to eat tacos, to lower the frustration level and reduce clean-up :).  This was back in the late 1950's, and at that time Salt Lake had very few, if any, Mexican food places, which was a hardship for our family.  In California, there were more Mexican food places than hamburger places.  In fact, I was amazed to discover in Salt Lake that there was such a thing as a hamburger fast food restaurant -- I didn't recall ever having been to one in California -- it was always a taco fast food restaurant.  So there was learning going on on both sides of the fence.

Spicy Taco Meat

1 lb ground beef
1/2 tsp celery salt
1/2 tsp ground cumin
1/2 tsp garlic salt
3/4 tsp onion salt
Cook together until meat is browned, stirring often.  Add:
2 tsp rice flour
Stir in well.  Then add:
2/3 Cup tomato juice
Cook 10 minutes more.  Serve.

Loaded Tacos

Corn tortillas -- we like the Grande or Burrito size tortillas -- they're bigger and hold more :)
Canola Oil -- just enough to cover the bottom of a skillet large enough to hold the tacos.  You can always add more if you're cooking a lot of tortillas and it gets too thin.
Fry the tortillas in the oil (try to keep it below the smoke point, but make sure it's hot enough to do the job), turning frequently until they're crisp, but not brittle.  If they go too far, don't worry about it -- just salt them when you take them out of the pan, break them into pieces and tell your kids you've got some "crunchies" for them.  I actually make a few of these on purpose -- they're yummy.  Homemade tortilla chips.  You can use store bought formed taco shells, but these are so much better!  Try it, you'll like it.  Fry all your tortillas at once.  Just layer them in between paper towels to absorb the excess oil and keep them warm.  When you're done and have taken your oil off the burner, grab your first tortilla with a paper towel folded in half underneath it in your hand and gently fold it in half, using your tongs to help create the crease.  If it cracks in half, you've got a crunchie -- move on to the next one.  Layer the following ingredients in the taco shell:

Meat -- spicy or plain (see above)
Cholula hot sauce (very flavorful but not too hot)
Grated cheddar cheese
Green onions, sliced into rounds
Lettuce, chopped
Tomato, diced small
Avocado, diced small
Sour cream
Black olives, sliced

If you'd like to combine the onions, tomato and avocado into guacamole to put on the tacos or to serve separately with the crunchies, here's a great recipe for it.

If serving guests and you're not sure what they like, you can put all the ingredients into separate bowls and let them load their own.  Makes for a fun party!


There you have it -- Loaded Tacos.  Let the fiesta begin!


Thursday

Herbed Tomato Soup

If you like tomato soup and have tried to buy it at the supermarket, you've probably noticed that most have wheat flour in them.  Here's a recipe for homemade tomato soup that's so simple and quick to put together that you could do it for lunch.  I got the recipe from my niece Jeanee years ago.  If you like chunkier soup, you can use fresh tomatoes or chunky canned tomatoes.  If you like smoother soup, you can blend up fresh tomatoes or use canned crushed tomatoes.  Either way, this is quick and easy for the next rainy day when you want tomato soup with your sandwich.

Herbed Tomato Soup

3 Tbsp butter
1 Cup chopped onions
Cook together until onions are tender, but not browned.
6 medium tomatoes or enough to yield 4 cups or 1 28-oz can diced or crushed tomatoes
1 8-oz can tomato sauce
1 tsp dried crushed basil
1/2 tsp dried crushed thyme
1/4 tsp pepper
Add all to onions.
4 Cups Swanson chicken broth
Add to above and simmer for 30-40 minutes (or not if you're in a hurry --it still tastes great :)


Tuesday

Pulled Pork (sugar free)

I wanted to do pulled pork in my crockpot today, but I'm still on my sugar free diet, so I went hunting online for some sugar free barbeque sauce.  I did find some that were sweetened with artificial sweeteners (including diet soda), but not one that was truly sugar free -- real and artificial.  Sooo.....I made up my own.  Which was kind of gutsy, really, because my brother and his family are in town and were coming for dinner tonight.  Luckily it turned out really good!  If you like very sweet barbeque sauce, then this isn't your recipe, but if you like spicy, tangy, kick-you-in-the-pants flavor, you'll love it.  Enjoy!

Pulled Pork (sugar free)

4 lb pork sirloin tip roast
2 8-oz cans tomato sauce
1 Tbsp liquid smoke
1/4 large onion, chopped
1 tsp minced garlic
1 jalapeno pepper, seeds and membrance removed, finely minced
1/2 tsp coarse ground pepper
1 tsp chili powder
1/2 tsp paprika
1/2 tsp cumin
1/2 Cup fresh squeezed orange juice

Combine all ingredients in crockpot.  Put in roast.  Cook on high 6-8 hours.  Turn off, remove lid, and shred pork with two forks, stirring in sauce as you go.  Serve on hamburger buns to your gluten eating friends, on a slice of toasted gluten free bread for the gluten free friends.  A lettuce leaf and a few slices of avocado are good additions too.  I served it with a salad for a complete meal.


Sunday

Homemade Mayonnaise

I can hear you asking, "Why would anyone want to make their own mayonnaise?"  I've always asked the same question.  However, recently my doctor put me on a totally sugar-free diet -- like not just giving up desserts and candy, but checking every label for hidden sources of sugar and no cheating with fake sugar.  Yikes!  And guess what has sugar in it -- mayo!  Who knew?  Well I'm here to tell you that it's hard to live without mayo, so I started researching homemade mayonnaise recipes, and found one that is pretty tasty, despite the fact that it is sans sugar.  Since some of you out there in blog land may have allergies to some of the ingredients in commercial mayonnaise, I'd thought I'd pass this along.  One of the great things about making your own is that you can choose what kind of oil you use.  Lots of people are allergic to soy, which almost all commercial mayonnaise is made with.  I have noticed new types made with other oils on the shelves lately (in my search for a sugar-free one, which was not to be found), so there are commercial options, but making your own is easy, so you choose.  Here it is:

Homemade Mayonnaise

1 egg
1/2 - 3/4 tsp salt
1/2 tsp dry mustard
1/4 tsp paprika
2 Tbsp lemon juice
1 Cup salad oil (I like canola)

Place egg, seasonings, lemon juice and 1/4 cup oil into blender container;  cover and process at blend.  Remove feeder cap and pour in remaining oil in a small steady stream slowly.  This is critical.  If you add it too fast, it won't emulsify, and you'll be left with an oily mess and have to start over.


My blender flicks little droplets out the top when the feeder cap is off, so I hold a folded paper towel over the opening except where I'm pouring in the oil.  Be sure you use a measuring cup with a good pouring spout.  When all the oil has been incorporated, let it run a little while longer to mix it well, and then spoon it out into a container and store it in the refrigerator.


And there you have it!


Friday

Fudge Brownies

My favorite brownies are the ones that are kinda soft and fudgy in the middle and have a thin, crackly crust on top and nothing else -- no frosting, no marshmallows, no mint layer, nothing.  Well, maybe just a sprinkling of powdered sugar for parties :).  Plain and simple chocolaty yumminess.  This recipe is just like that.  I got it years ago from a lady I worked with.  I already had several brownie recipes, but wasn't that enthused about any of them.  Norma brought this to work during the holidays to share with everyone, and as soon as I tasted it, I knew I had found chocolate nirvana.  The nuts in it are optional.  I love them, but my husband is allergic, and my kids and grandkids don't like them, so I usually skip it.  The brownies are wonderful anyway.  I hope you'll like them too.

Fudge Brownies

3 Cups sugar
1 Cup unsweetened cocoa
1 Cup melted butter or margarine
6 eggs
2-1/4 Cups rice powder gluten free flour mix
1-1/2 tsp baking powder
3/4 tsp salt
1 tsp xanthan gum
1 Tbsp vanilla
1-1/2 Cups chopped nuts (opt.)

Melt the butter; add cocoa and sugar and mix well.  Add eggs one at a time, beating well.  Whisk dry ingredients together and add to chocolate mixture.  Mix well.  Stir in vanilla and nuts.  Pour into greased 9 x 13 pan.  Bake at 350 for 30-45 minutes. 


Want to make them even more decadent?  Add 1/2 Cup chocolate chips to the batter before baking.  Mmmmmmmmm.


Wednesday

Ron's Special Skillet Dinner

Remember when I talked about my husband's creativity in the kitchen in this post?  This recipe is his most famous.  I don't even try to make it -- it's his baby.  The most interesting part is that it tastes different every time he makes it, so it's always a surprise.  Our grandkids love it -- in fact our oldest granddaughter wants him to make it for her birthday dinner every year!  Don't be intimidated by the lack of specific amounts.  Trust me, it'll turn out good and you'll have lots more fun if you just don't worry about it.  The ingredients are very flexible -- you can pretty much throw in whatever you have in your fridge.  Just get out a pan that will feed your family when it's full, and go for it! 

Ron's Special Skillet Dinner

Meat:  your choice:  pork, steak, chicken, sliced thin
Vegetables:  your choice, chopped:  garlic (minced) onion, cabbage, cauliflower, celery, carrots, green pepper, zucchini, tomato, mushrooms (sliced), jalapeno pepper (no membranes or seeds unless you like it hot!  1/2 for small batch, 1 whole for large batch), olives.
Other ingredients needed:  Swanson chicken broth or Swanson aseptic box of beef broth, or a combination of the two, or just plain water; cornstarch, if you want to thicken the broth; chorizo sausage (1/2 sliced for small batch, 1 whole sliced for large batch) if you want to kick up the flavor a notch; LaChoy Soy Sauce (it's gluten free); cooked brown or white rice.

Directions:

Put some oil in your skillet and start browning your meat in it.  Then add the broth or water.  You'll need 1-2 cans or 1 box broth or 1-2 cups water depending on the size of the batch.  If you want a thicker consistency, stir 1-3 Tbsp cornstarch into a small amount of cold water, and add it to the broth or water -- it will thicken as it heats up.  Start adding your vegetables.  If you're chopping as you add, put them in in the approximate order given above -- harder vegetables first, softer ones toward the end, so they don't get too soft while cooking.  Stir and turn often.  Season with salt and pepper and soy sauce.  Serve over cooked brown or white rice.

Here's what it looks like when everything is in the skillet and starting to cook:


And this is how it looks when it's done:


So good and so good for you!


Monday

Braised Leeks

Have you ever done much cooking with leeks?  I didn't for the longest time -- I thought they looked like overgrown green onions, and couldn't imagine what I could possibly do with them.  However, they're very adaptable.  You can use thin slices in salads or on sandwiches, or slice them into soups and pasta dishes.  They're very mild and delicate tasting.  This is the first recipe I've run onto (besides leek soup) where they are the star ingredient!  I decided to try it, and it's delicious.  I hope you'll try it too. 

Braised Leeks

3 leeks, white and light green parts only, halved lengthwise and cut into 3" lengths
2 Tbsp butter
Coarse salt and ground pepper

Separate layers of leeks and rinse well.  Melt butter over medium heat in a large skillet.  Add leeks and 3/4 cup water.  Season with salt and pepper.  Cover and cook at a medium simmer until leeks are very tender (adding more water if necessary) for 14-16 minutes.  Serve hot.  4 servings.


Saturday

Shrimp in Spiced Tomato Sauce

I know -- another shrimp recipe.  But remember what I said about substituting chicken in this post?  So, you choose.  This is really simple to make and yummy if you like spicy food, but not overly spicy.  This is just right.  And you can freeze it for later, if you want.  It's delicious with quinoa or brown or white rice.

Remember the zester I showed you a picture of in this post?  You get to use it again here!

Shrimp in Spiced Tomato Sauce

1 Tbsp olive oil
1 medium onion, cut into medium dice
1 Tbsp plus 2 tsp minced peeled fresh ginger (from a 1-inch piece)
1-1/2 tsp ground coriander
1/8 tsp cayenne pepper
1 tsp lemon zest
1 can (28-oz) diced tomatoes
coarse salt and ground pepper
1 lb large frozen raw shrimp (peeled and deveined)
chopped or dried cilantro to sprinkle on top when serving

In a medium skillet, heat oil on medium.  Add onion and ginger; cook until onion is softened, about 3 minutes.  Add coriander, cayenne, and lemon zest; cook, stirring frequently, until fragrant, about 2 minutes.
Add tomatoes and bring mixture to boil; reduce to a simmer and cook 10 minutes.  Season with salt and pepper.  If you want to freeze this, take it off the heat, and let cool to room temperature.  Place frozen shrimp in a 1-gallon freezer bag and pour cooled tomato sauce on top.  Press out air, seal bag, and freeze flat.  Store in the freezer for up to 2-1/2 months.  When you want to use it, thaw overnight in refrigerator.  Transfer to a medium saucepan and bring to a simmer over medium-high heat.  Cook until the sauce is hot and the shrimp are opaque throughout, about 3 minutes.  Serve. 

If you want to eat it right away, thaw the shrimp and add to simmering sauce .  Cook until the shrimp are opaque throughout, about 3 minutes.  Serve immediately and sprinkle with cilantro.  4 servings.


Thursday

Zucchini with Lemon and Thyme

Here's another recipe for you green-thumb, gardening people to save for later in the summer when your zucchinis start running amok.  Our first experience with zucchinis was an interesting one.  When my husband was in graduate school at Utah State we lived in student housing, and thus didn't have a garden.  However, one summer someone in Logan offered a 1/2 acre of their land to any group of students who wanted to have a small garden (each couple got about two rows), and we were poor and thought this would save us money, so we signed up.  We had never gardened before, but knew we wanted some tomatoes and cucumbers, and had heard that zucchini was pretty easy to grow.  So we planted a couple tomato plants, a couple cucumber plants, and five hills of zucchini with 3 plants in each hill.  I can hear you experienced gardeners laughing from here, and for you inexperienced gardeners, take my word for it, you only need 1 or 2 zucchini plants, not fifteen.  Having no idea what the harvest would be, we carefully tended our plants, which grew like crazy, and before we knew it we were harvesting 15-20 zucchini per day.  I kid you not -- PER DAY.  Well, there's only so much zucchini you can eat, and you quickly discover that there's only so much you can give away.  We hated to see it go to waste, so being enterprising college students, we hit on the idea of leaving boxes of zucchini in the student housing laundry centers (under the cover of dark so no one would know where they were coming from :).  Amazingly, every day the boxes were emptied.  We wondered where all that zucchini could possibly be going, and eventually discovered that the large population of foreign students attending Utah State were mostly vegetarian and were delighted with the free produce that had started magically appearing in the laundry centers!  Talk about a win-win situation!  We never did disclose the source of the zucchini; we were just happy that it was getting eaten.  And we never planted fifteen zucchini plants again.  Anyway, here's a tasty recipe for zucchini, whether you grow your own or not (I found this recipe and the recipes in the next two posts in the Everyday Food Magazine.  It's a great little recipe magazine that I'm having fun cooking through :).

Zucchini with Lemon and Thyme

1-1/2 lbs zucchini (about 3 medium), chopped
4 tsp olive oil

Heat the olive oil in a large skillet over medium high heat.  Add the zucchini and toss to coat in oil.  Season with coarse salt and ground pepper and cook until golden brown in spots, about 4 minutes.  Transfer to serving bowl.  Add:

1 Tbsp fresh lemon juice
1 tsp fresh thyme leaves (or sprinkle on some dried thyme if you don't have any fresh)

Season with additional salt and pepper if you think it needs it.  Serve hot.  4 servings.


If you want another recipe using zucchini, check out the comment on this post from a devoted reader.  Thanks Anna! 


Tuesday

Breadsticks and Soft White Bread

Did you love the breadsticks they serve with meals at Olive Garden?  When you found out you couldn't have wheat anymore, did you think you'd never get to have anything like them again?  Well, fear not, today's recipe for breadsticks doesn't look as pretty as theirs (I'll bet they've got some cunning little pans that they cook theirs in), but taste great and will satisfy your craving. 

I actually came up with these kind of by accident.  One of my little grandsons has been complaining of a tummy ache every time he eats wheat products lately, so I've been experimenting with the Favorite White Bread recipe to see if I could make it lighter and more flavorful so he'd think it was wonderful.  I made some ingredient changes and then decided to try just mixing it in the bread maker, but baking it in my oven.  After putting what I needed in the pan, there was dough left over, so I thought I'd make them into breadsticks and see how they tasted.  I wish I had let them raise longer -- I think they would have looked better -- but my husband was clamoring for me to hurry up and cook them (I cooked the bread first, and you know how fresh bread baking smells, and he knew he wasn't getting any of that :), so I hurried them up too fast and they didn't get plump enough before they went in the oven.  Oh well.  He said they tasted great, however, and the little guy likes the bread, so I'm counting the experiment as a success.  So here's the recipe, and the instructions for both the breadsticks and the bread:

Breadsticks and Soft White Bread

4 Tbsp butter, melted
3/4 Cup evaporated milk
3/4 Cup warm water
3 eggs
1-1/2 tsp salt
1 tsp vinegar

Whisk together and put into bread machine pan.

3 Cups Basic Gluten-Free Flour Mix
1/2 Cup tapioca flour
1/3 Cup potato flakes
1/4 Cup sugar
1 Tbsp xanthan gum

Whisk together and put on top of liquid in bread machine pan.  Make well in flour mixture and fill with:

1 scant Tbsp yeast (see picture of this step in this post if this doesn't make sense to you)

Choose setting on your bread machine that will mix the dough, but not bake it.

When it's completed the mixing setting, remove pan from bread machine and divide dough into two medium sized (4" x 7-1/2") bread pans that have been liberally sprayed with Pam, or 1 bread pan and 1 sprayed cookie sheet, or make it all into breadsticks -- you choose.  Remember, the dough will not be firm enough to handle, like regular bread dough -- it's much more liquidy.  For the bread loaves, smooth the top and let raise until it passes the edge of the pan and looks like a real loaf of bread.  For the bread sticks, pat the dough with greased fingers (it helps to spray the top of the dough with Pam too) into a rectangle, and then cut into strips with a sprayed pizza cutter.  After cutting them, scoot them apart from each other a little so you'll have individual sticks.  Let raise to whatever size you like.  For both the bread and the breadsticks, bake in a 375 oven until browned on top and a toothpick inserted in center comes out clean.


For the breadsticks, remove from oven and brush immediately with butter and sprinkle lightly with garlic salt.  Serve warm.


For the bread, remove from oven, brush top with butter, let rest 2 or 3 minutes, then remove from pan and place on rack until completely cooled. 


Sunday

Summer Squash Casserole

If you have a vegetable garden this year, and have planted crookneck squash or zucchini squash, be sure you keep this recipe handy.  It's a delicious, different way to use summer squash.  Today I used crookneck squash that I bought at the store -- it was the first time I had seen crooknecks since last summer!  I actually prefer them for this recipe because they have a firmer texture, even when cooked, than zucchini do.  However, if you get overrun with zucchini (and who doesn't :) they can be used too.  Just be sure not to overcook them in the first step, and drain super well.

Summer Squash Casserole

2 lbs. crookneck or zucchini squash, cut in 1/2" rounds, do not peel
2 eggs, beaten
1 Cup mayonnaise
1 small onion, chopped (if your family doesn't like chunks of onion in their food, and you still want the flavor, grate the onion instead)
1/4 Cup green pepper, chopped (I used yellow today, because I had some left over -- use any color you like)
3/4 Cup grated parmesan cheese, divided
1/4 tsp thyme
salt and pepper

Cook squash in boiling water 5-10 minutes or until done.  Drain well.  (I drain the water off, then place them on several paper towels in a single layer and let them rest, blotting the top with additional paper towels.)
Beat eggs, blend in mayonnaise until smooth.  Add green pepper, onion, and thyme and 1/2 Cup of the cheese.  Fold in well drained squash gently.  Salt and pepper to taste.  Spoon into 9 x 13 glass casserole dish.  Sprinkle top with remaining cheese, dot with butter, and bake uncovered in a 375 oven for 25-30 minutes, or until lightly browned.   Serve hot.


Dig in!


Friday

Hearty Hotcakes

If you like pancakes that are more "whole grain" and have a texture to them, you'll love these.  There are a few variables, so pay close attention!  If you like traditional pancakes, click here or if your family only likes waffles, click here.

Hearty Hotcakes

1/3 Cup tapioca flour
1/3 Cup potato starch
2/3 Cup brown or white rice flour
2/3 Cup cornmeal
2 tsp baking powder
1 tsp baking soda
1/2 tsp salt
1/2 tsp xanthan gum
4 large eggs, separated
2 Cups buttermilk

Mix egg yolks and buttermilk together.  Whisk together flours, cornmeal, baking powder, soda, salt, and xanthan gum in a bowl.  Pour egg/buttermilk mixture in and whisk to evenly moisten.  Beat egg whites on high until peaks form.  Fold gently into batter.  Cook on 375 griddle.  Makes twelve 5" pancakes.

Now for the variables:  If you can't tolerate the buttermilk, you can use rice or soy milk, mixed with 2 Tbsp vinegar to sour it.  However, if you do, you will have to double the amount of tapioca flour and potato starch to get the right consistency.

Also, if you have found a source of gluten free rolled oats, you can use 2/3 Cup rolled oats in place of the tapioca flour and potato starch.  Again, if you use the rice or soy milk/vinegar, you'll probably have to increase the amount to get the right consistency. 

For those of you who follow this blog but don't have allergies, substitute rolled oats for the tapioca flour and potato starch, use regular flour in place of the rice flour, and eliminate the xanthan gum.


Here's a stack with melted butter and blackberry syrup -- yum!  These have a delightful kind of crunchy texture and nice flavor, a change from regular pancakes.  For topping suggestions, click here


Wednesday

Stuffed Green Peppers and Creole Sauce

Actually, you can use green, orange, yellow, or red peppers (there isn't really that much taste difference) and it looks prettier and is more fun if you do, so the title is a tad misleading :).  This is a colorful, different way to eat your vegetables.  Maybe you can even get your kids to try it!  If you decide to make the Creole Sauce, you can do it up to several days in advance and keep it in your refrigerator.  If you use just regular tomato sauce, you'll need to spice up the meat mixture a little more.  You can also do the rice in advance to speed things along (or use up leftover rice from another meal).

Stuffed Green Peppers

3 large peppers, you choose the color
1 lb ground beef
1 Tbsp grated onion or 1 green onion, minced
1/3 Cup celery, finely chopped
1-1/2 Cups cooked brown or white rice
Salt and pepper to taste
2 8-oz cans tomato sauce or homemade Creole Sauce (recipe below)
(if using plain tomato sauce, add 1/2 tsp each garlic powder, onion powder, and chili powder to the meat mixture)

Wash peppers; cut in half lengthwise; remove seeds and cut away seed parts, leaving a clean shell.  Place in boiling salted water and boil 5 to 8 minutes until tender.  Remove from water and drain thoroughly.

While peppers are cooking, brown meat, onion, and celery together.  Add rice and seasonings.  Stir in 1 can tomato sauce, or 1 Cup Creole Sauce to moisten meat. 

Fill pepper shells with meat mixture.  Top with tomato sauce or Creole Sauce.  Can be eaten immediately or reheated in a 375 oven until hot through.


Creole Sauce

2 Tbsp olive oil
1/2 Cup green pepper, finely chopped
1/2 Cup onion, finely chopped
1 clove garlic, finely chopped
2-1/2 Cups canned tomatoes
1 tsp chili powder
1 tsp sugar
1 small bay leaf
1/8 tsp ground cloves
1 tsp salt
1/4 tsp pepper

Saute green pepper, onion and garlic in olive oil over medium low heat until vegetables are soft, but not browned.  Add remaining ingredients and continue cooking over low heat 40 to 50 minutes or until thick.  Makes about 2 cups.  Refrigerate until ready to use.