Subscribe RSS

Tuesday

Texas Sheet Cake

I asked for this recipe ages ago after eating it at a party and loving the fact that it tasted terrific and made enough for a crowd.  After going wheat free, it sat in my recipe box for years until I finally decided it was time to try it with a GF flour mix and some xanthan gum and see how it turned out.  It worked great!  Since then I've made it numerous times with all the GF flour mixes and it works with all of them.  I was recently able to locate some superfine rice flour at an oriental market -- it's called Rice Powder -- and the cake is even better using that in the basic GF flour mix rather than plain rice flour -- no grittiness!  So that you don't have to go back to the March 6 post that has the two GF mixes in it, the basic GF mix using the rice powder would be: 
4 Cups rice powder
1-1/3 Cups potato starch
2/3 Cup tapioca flour
Because I bake a lot, I always make up twice this much and store it in a 14 cup Rubbermaid container. Since I started making this cake again, it's now expected at every family get-together, despite the fact that 99% of the people there don't have to eat wheat free!  And there are never leftovers -- a sure sign of great taste.  If you need a quick cake for a crowd, here's your recipe (wheat eaters--use regular flour and leave out the xanthan gum):

Texas Sheet Cake

2 Cups Gluten Free flour mix
2 Cups sugar
1 tsp xanthan gum
1 tsp soda
1/8 tsp salt
Mix together in a large bowl; set aside.

1 cube (8 Tbsp) butter
3 Tbsp unsweetened cocoa powder
1/2 cup vegetable oil
1 Cup water
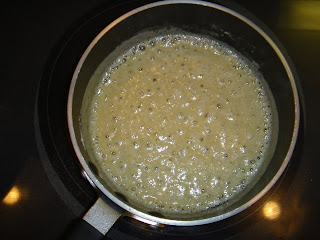
Mix together in a saucepan; cook over medium high heat stirring constantly until it comes to a boil.  Take off heat and stir into flour mixture.

2 large eggs
1/2 Cup buttermilk 
1 tsp vanilla extract
Whisk together in a small bowl.  Stir into above.

Grease and flour a 13" x 18" cookie sheet.  I just use whatever GF mix I'm using in the recipe to flour the pan.  Pour batter into cookie sheet and spread to level.


Bake at 400 for 20 minutes.  While it's baking make:

Chocolate Frosting for Texas Sheet Cake

1 cube (8 Tbsp) butter
6 Tbsp evaporated milk
3 Tbsp unsweetened cocoa powder
Put into saucepan (you can use the same one you used for the cake to save a pan to wash :) and cook over medium high heat stirring constantly until it comes to a boil.  Take off heat, pour into a small mixing bowl and add:

1 tsp vanilla extract
2-1/2 Cups powdered sugar
Beat with hand mixer until smooth.  Add more powdered sugar if you want it thicker.

Let cake cool for 10 minutes and frost. 


Because the cake is still a little warm, the frosting will melt just slightly and turn shiny and glaze-like on the cake.  Allow to finish cooling, cut into pieces (as many as 24!) and serve.


Go ahead and get creative with toppings, if you want (what's not to love about fresh strawberries and chocolate?).  Or if you're outdoors at a picnic, go super casual and serve it plain on a paper napkin!  I guarantee, everyone will love it!

Sunday

Nachos and Guacamole

On my March 16 post about wheat free meals for kids, Wendy made a comment about nachos being her son's favorite dish.  I have found that Mexican food in general is a good bet for those eating wheat free -- corn tortillas can be substituted quite successfully for flour tortillas in recipes and restaurants too (just ask your server).  And what restaurants have been doing with nachos is nothing short of amazing!  Gone are the days of just chips and cheese (unless you're at the State Fair, of course).  Nachos have become an entire meal!  So I decided to put together some nachos to give you some ideas, and then you can cut loose and get all creative with your own nachos using your favorite ingredients (or whatever your kids will eat :).

Before I give you the ideas, though, have you seen these chips in your area?  They are wonderful -- addictive even!  And best of all, they're gluten free!  See the little GF symbol in the lower left-hand corner of the bag?  Try them, I think you'll be hooked too. 


Nachos

Chips -- Tortilla Chips, Fritos, or the Multigrain chips above
Meat -- shredded beef, shredded chicken, or browned hamburger with spices of your choice
Beans -- pinto and black are what restaurants usually use but don't let that limit you, drained and rinsed well
Sliced green onions
Sliced olives
Chopped tomatoes
Diced avocados
Any other chopped up veggies you and/or your kids like
Shredded cheese, cheddar usually, but other melting cheeses would be good too
Sour cream, if you like it, on the side or on top after melting the cheese

Stack it up and microwave until the cheese melts.


For the nachos above I used the multigrain chips, shredded beef (from leftover pot roast), sliced green onions, black beans, sliced olives, chopped tomatoes, diced avocado and shredded cheddar cheese, with a dollop of sour cream on the side.  Yummy!

I thought I'd also include in this post my mom's recipe for guacamole, which I think is the best I've ever tasted (of course, I may be prejudiced).

Mom's Guacamole

2 ripe avocados
1/2 small onion, very finely chopped
2 medium tomatoes, diced
2 Tbsp lemon juice or more to taste
salt and pepper to taste
6-8 drops Tabasco Sauce or more to desired heat

Thoroughly mash avocados; add at least 2 Tbsp lemon juice -- the lemon juice keeps the avocados from turning dark and also adds flavor.  Stir in the chopped onion and tomatoes.  Add salt, pepper and Tabasco to taste.  Serve with tortilla chips.

OK, that's the original recipe.  Now for my tweaks (I can't help myself!)  My mom likes lots of onion in hers -- hence the 1/2 small onion.  Me, not so much.  So I usually substitute two green onions, white and green parts, finely chopped.


Then, because I like the avocado chunkier, I just mash it gently, not thoroughly, using a potato masher.  And because I like the flavor of the Tabasco, but not all the heat, I throw in some Cholula Hot Sauce first (it's not as hot and very flavorful), and then add the Tabasco a little at a time until it gets to the heat I like.


So there you have it!  It's yummy and will disappear fast!  If you have any left over, be sure you put the plastic wrap directly on top of the guacamole to keep the air from darkening the avocados while storing in your refrigerator.  Enjoy!


Friday

Favorite White Bread -- New and Improved!

I was thinking about bread the other night (in the middle of the night, of course -- why is that?) and remembered when I was first married.  I didn't know how to boil water, as they say, but learned how and even started making my own bread.  This was before bread machines, so it was all by hand.  My husband loved the bread and told me that we'd be married forever as long as I kept making homemade bread.  And, so far, so good!  Actually, once you start eating homemade bread, it's hard to go back to store bought, although artisanal bread from small, local companies is great, albeit expensive.  Anyway, one of my favorite white bread recipes back then had cooked potatoes in it.  So I started wondering if some potato flakes added to the Favorite White Bread recipe would be good.  I tried it, and it is!!  They add more flavor and improve the moisture and texture of the bread.  Plus I made a couple of other small changes to make the recipe more bread machine friendly. 

And then, remember my friend Geri with the 10 kids who feeds her whole family gluten free and who gave me the Favorite White Bread recipe?  (See March 10 post)   I got an email from her the other day, and she has started a blog too!  In fact, we started them the same week -- what are the chances?  I checked out her blog, discovered she had posted her Favorite White Bread recipe on it, compared it to my March 10 post and guess what?  She's been tweakin' !  (It's OK, we all do it :)  Yep, that recipe is a little different than the one I got over a year ago!  So here is the new and improved Favorite White Bread recipe, with Geri's tweaks and my tweaks all rolled into one.  I hope you'll try it -- it really is new and improved.

Favorite White Bread - New and Improved 
1-1/2 Cups warm water
1/4 Cup oil
3 eggs
1 tsp vinegar
1-1/2 tsp salt

Beat together and put in bread machine pan.

3 Cups basic Gluten-Free Flour Mix (see Mar 6 post for mix recipe)
1/2 Cup cornstarch or tapioca flour
1/3 Cup potato flakes
1/4 Cup sugar
1 Tbsp xanthan gum

Mix together and put on top of liquid in pan.  Make well in flour mixture and put in well:

2-1/2 tsp yeast  (see picture in Mar 10 post if this doesn't make sense)

Choose crust color (I like medium) and loaf size (2 lb) and start machine.  During first kneading, add more GF flour mix gradually, if needed, until desired consistency is reached.  Use rubber spatula to scrape down sides of pan during first mixing.

Geri uses a Bosch bread mixer and then transfers the dough into her own pans and bakes it in her oven, rather than using a bread machine.  If you'd like to see her directions on how to do that, as well as a variation of the recipe using Agave sweetener rather than sugar, and her cute blog, please visit http://lovinlivinhealthy.blogspot.com/.  Go Geri!

Wednesday

Minestrone Soup

We were up in the mountains last weekend, and it is still winter up there -- brrrr!  It's warming up some and starting to melt, but there was still about two feet of snow where we were, and it snowed lightly Sunday afternoon.  So we had Light As A Feather pancakes Saturday morning (very cozy) and I made our favorite Minestrone Soup Saturday afternoon (ditto).  This recipe makes a big batch, so we noshed on it whenever we felt chilly all weekend.  I got this recipe from Our Best Bites and was surprised to discover that it was wheat free (no pasta).  I had never seen a recipe for minestrone soup without pasta before, and really wondered if it would be good without it -- and it absolutely is.  It does have the surprise ingredient of a can of Campbell's Bean with Bacon Soup in it, which gives it a lovely slightly smoky flavor.  I checked the ingredient list on the can and it has the vague "food starch" listed for the thickener, but I already knew that my husband doesn't react to it -- it's one of the few Campbell's soups that he can eat.  However, I checked their website under gluten-free and discovered that they have very stringent standards for their gluten-free labeling (as they should have) and not one of their soups measures up.  So those of you with Celiac Disease should avoid using the soup, and may want to try a few drops of liquid smoke (a brown liquid that comes in a bottle--the brand I have is Reese) or actually cooking a couple slices of bacon crisp and then chopping it fine and adding it to the soup.  If you don't use the Bean with Bacon soup, add an extra can of beans.  Also, the recipe calls for a can of great northern beans, but my supermarket didn't have any.  I had some black beans on hand (and my husband tolerates them better than other types) so I used those instead.  When I made the soup this weekend, I had some brown rice shell pasta on hand, so I tried throwing in about a cup worth towards the end of the simmering, and it turned out great! 

Minestrone Soup

1 lb Italian sausage
1 medium onion, diced
4 cloves minced garlic
4 Cups water
2 stalks celery, diced
2 large carrots, diced
1-2 small zucchini, quartered and chopped
1 box Swanson's beef stock (the aseptic beef stock is gluten free; the can of beef broth is not)
1 10-oz can Bean with Bacon Soup or liquid smoke to taste (see note above)
1 28-oz can diced tomatoes
1-2 cans great northern beans, drained and rinsed well (see note above)
1 Tbsp sugar
1 tsp oregano
1 tsp salt
1/2 tsp black pepper
1/8 tsp red pepper flakes

Remove casings from sausage and crumble meat; brown with onion and garlic. 


Add rest of ingredients in a large stock pot or slow cooker. 


Bring to boil; cover and reduce to simmer.  Cook for one hour, stirring occasionally.  For slow cooker, cook all day on low. 


See the cute little shell pasta?  Excellent soup with or without -- you choose.  Serve with grated parmesan on top.


I forgot to sprinkle on the parmesan (it was so yummy anyway, we never missed it), and I made my favorite GF biscuits (see recipe on March 6 post) as a side -- a very satisfying meal. 


Monday

Light As A Feather Pancakes

Saturday mornings are just the best....unless your kid has an early morning soccer game and it's drizzling and windy outside!  But on those Saturday mornings when you've got some free time and a special breakfast seems like a good idea, here is a pancake recipe that is wonderful:

Light As A Feather Pancakes

1-1/4 Cups GF flour mix (I like 4 flour bean mix best)--see March 6 post for flour mix recipes
1/2 tsp xanthan gum
1-1/2 Tbsp sugar
1 tsp baking soda
3/4 tsp salt
1-1/4 Cups buttermilk
1/4 Cup sour cream
3 large eggs, separated
2 Tbsp butter, melted

(wheat-eaters--substitute regular flour and eliminate xanthan gum)  Whisk dry ingredients together.  Stir buttermilk and sour cream together in a bowl.  Add egg yolks and melted butter to buttermilk mixture; stir well.  Beat egg whites to soft peaks.


Pour buttermilk mixture over dry ingredients and whisk until just combined (batter should be lumpy with visible streaks of flour).


Using spatula, fold whites into batter until just combined.  Do not overmix.


Cook on hot greased griddle.  Makes about 8-10 four inch pancakes.


These are light and delicious--just how pancakes ought to be.  The picture shows good ol' butter and syrup on top, but if you want to make them healthier, try:
peanut butter or other nut butters
an easy-over cooked egg on top (for those who need a little protein at breakfast)
applesauce
sliced bananas with syrup on top (my personal favorite)
a quart of peaches put in your blender and pureed, then used like syrup (my kids' favorite)
any fresh fruit in season (think berries-yum!) with whipped cream on top
jam, jelly, honey, brown sugar, powdered sugar, or Smuckers fruit syrups (OK, they're not healthier, but sometimes a nice change-up :)

If you have something that you love on pancakes, send it along in a comment and I'll publish it!

Happy Saturday mornings!


Saturday

Shrimp Fettucini and a few words about pasta

I had our literary group to my house for our book review and luncheon today and decided to serve them one of my favorite dishes -- Shrimp Fettucini.  I got the original recipe from my friend Barb, who is one of the best cooks I know.  Since getting the recipe, I have cut back on the oil and butter, and I sometimes substitute chicken for the shrimp if my guests don't like or are allergic to shellfish--just cut it into chunks and cook with the veggies, or panfry it separately, cut it up, and add just before serving.  I also add vegetables to the basic recipe, like today when I added asparagus (doesn't asparagus just taste like spring to you?)  It's a very adaptable recipe, and always delicious.

So here's the basic recipe -- enough for 8-10 people, depending on what else you're feeding them:

Shrimp Fettucini

1 Cup olive oil
1/2 stick (4 Tbsp) real butter
1 lb fresh mushrooms, sliced
16 green onions, chopped
12 cloves garlic, pressed or diced
2 lbs large shrimp (I get frozen raw shrimp, already peeled and deveined, but you can use fresh)
14 oz brown rice fettucini (or regular pasta for you wheat-eating people)
1/4 Cup fresh lemon juice
2 tsp pepper
shredded parmesan cheese (you can use grated, but shredded looks and tastes better)

Prepare the pasta and have it dried and waiting between two clean kitchen towels.

This cooks pretty fast, so it's best to have everything chopped (veggies), thawed (shrimp) and ready to go before you begin.


Put on a kettle of water to boil (will be used with pasta later).  Heat the oil and butter over medium to low heat.  You don't want it so hot that the garlic browns.  Saute mushrooms, green onions, garlic and any veggies you're adding in the oil/butter mixture.  Add shrimp and cook until it turns pink.  Sprinkle with lemon juice and pepper.  Taste and season with salt if you think it needs some.  Transfer to serving bowl.  Warning:  don't cook the shrimp too long--just until it's pink--or it will be rubbery.  That's why I use raw shrimp.  If you use pre-cooked shrimp, it gets rubbery just heating up in the sauce.

Put dried pasta into a colander, pour boiling water over it to reheat and unstick it.  Drain and put into a serving bowl; pour a little olive oil over it and toss to keep it from clinging together.  Serve immediately. 
The shredded parmesan can be served in its own little bowl so each person can take as much as they like.

For my luncheon today I took the tails off the shrimp (this was a group of ladies, after all), but if you like to get up close and personal with your food you can leave them on, necessitating putting the shrimp in your mouth and pulling the tail off with your fingers while you're eating them (I admit that 9 times out of 10 I leave them on :).  As you can see in the picture, I used a combination of brown and white mushrooms today, and added the asparagus mentioned earlier.  That little pile of yellow stuff in the picture is the pressed garlic.  I served it with a green salad.  Doesn't that make a pretty plate?


I love pasta!  Since going wheat free, I've tried about every kind of pasta out there in wheat-free-ville:  corn pasta, quinoa pasta, spinach pasta (which turned out to have wheat in it--no wonder it was so good!).  Both the corn and quinoa pasta tended to dissolve in the water or fall apart after cooking, tasted funny to me, and had a weird mouth-feel.  Finally I found Tinkyada Pasta Joy brown rice pasta.  It's a little pricey, but worth every penny -- it cooks, tastes, and feels just like pasta should.  When I serve it to guests, they never suspect that it's not the real deal.  And it comes in quite a few shapes -- spirals, shells, elbow, fettucini, spaghetti, fusilli, and penne.  There is a caveat, though.  For perfect results, you have to follow the cooking instructions exactly, (timing, rinsing with cold water, drying) which is a little more work than wheat pasta, but worth the results.  I've also discovered that if I'm going to put in into the sauce I've made (i.e. mixed into spaghetti sauce or when making macaroni and cheese), it helps to cook it 2 or 3 minutes shorter than the time given because it cooks a little getting heated up in the sauce.  Here's a picture of what the packaging looks like so you can find it where you live.  They also have a website.  If you love pasta, you'll love this!


Thursday

Enchilada Casserole

Here is the recipe I promised you in my last post.  Enjoy! 

Enchilada Casserole

1-1/2 to 2 lbs hamburger
1 Cup chopped onion
1/4 tsp. oregano
1 Tbsp chili powder
1/4 tsp Tabasco hot sauce
1 tsp garlic powder

Cook together until meat is browned.  Drain fat.  Put back in pan.


(In case you're wondering what those green flecks are, I discovered I was out of onions when I started making this.  I had lots of green onions, though, so I used those :)

3/4 Cup rice flour (regular flour in original recipe) -- Sprinkle it over the top of the meat and then mix in well.


3 Cups water -- Add to meat and mix well for gravy consistency
2-8 oz cans tomato sauce -- Stir into gravy.  Add salt and pepper to taste.  Simmer.


4-6 corn torillas, cut into fourths for easy handling
3 Cups grated cheddar cheese

Layer in 9 x 13 casserole:  1 thin layer meat sauce, layer of torillas, layer of cheese.


another layer of meat, tortillas, cheese; layer of meat and cheese to finish.


Bake at 350 for 25 minutes.


1/2 head lettuce, chopped

To serve, put chopped lettuce on top of casserole (optional) 


I know the chopped lettuce on top sounds weird (I threw on some chopped avocado too), but the cool crunchiness of the lettuce with the hot creaminess of the casserole is amazing.  The kids may not like it but the adults will!


Tuesday

Ideas for Kid's Meals

I had a comment from Gabi wondering if I had any suggestions for easy meals for kids.  Yes!  In fact, my next post will feature my pickiest eater's (honest, he'd hardly eat anything beyond peanut butter) favorite casserole.  I know!  Most kids don't even like casseroles!  But this one was a favorite with the whole family and still is -- Enchilada Casserole.  Best of all, it uses ingredients you probably already have on hand, it's easy to do, it's yummy, and it's wheat free!

But back to Gabi's comment.  Breakfast:  cold cereal.  Right now I have in my pantry Kellogg's Corn Flakes, General Mills Cinnamon Chex, and General Mills Honey Nut Chex.  Plain Rice Chex and Corn Chex are good too.  All are guaranteed gluten free and say so on the box -- hooray for better labeling!  If you don't feel like cold cereal is very healthy and want to keep it to a minimum (and I agree), go for eggs and toast (with your wheat free bread), pancakes (some future posts will feature pancake recipes--stay tuned!), fresh fruit, or think outside the box and try soups, leftover rice heated up and topped with brown sugar, syrup, fresh fruit, yogurt or milk products they're not allergic to, smoothies, or anything left over from dinner that they like.  I think we tend to get pretty narrow in what we think we can eat for breakfast, when in reality we can eat anything we want!  I had some leftover soup the other morning when it was cold, it tasted fantastic, and I didn't get hungry until about 1:00!  This next suggestion only works if you're not allergic to milk or oats, but one of my personal favorites for breakfast is oatmeal with a scoop of ice cream on top -- chocolate chip ice cream in particular :).  I'm not a huge fan of oatmeal, but it's great with ice cream!  I figure it's about the same as topping it with milk and sugar, but way more fun.  If you can't do milk, sorbet works too.

Lunch:  sandwiches made with wheat free bread, or with romaine lettuce (see March 4 post), soups, leftovers that they like, fresh veggies dipped in a dressing they like (and can tolerate).  Kids love to dip -- if you can figure out something to dip in, they'll eat about anything!  Think about things you can spread in celery -- peanut butter, cream cheese, Cheese Whiz -- and then let them stud it with fun things like raisins or olives or dried fruit chunks. 

Dinner:  I don't believe in fixing separate things for kids for dinner -- they should learn to eat whatever you're fixing for the family.  I know from experience, though, that picky eaters can make you crazy, so when planning your meal, try to include at least one thing that you know they'll eat (and I don't mean dessert), let them eat as much of that thing as they want, and encourage (bribe, threaten, whatever works :) them to eat a little of the other parts of dinner.  If you're having a hard time planning meals, an easy way to plan a nutritious meal is to think 1 protein, 1 starch (potatoes, rice, polenta, etc.), and 1-2 vegetables.  I have a friend with five boys who always brings a big salad to the table before the rest of the meal -- a fantastic strategy!  Starving (aren't they always?) boys will eat quite a bit of whatever hits the table first, so she knew they'd at least get some veggies that way.  After the salad had been eaten she'd bring out the main course.  I thought this was brilliant and wished I'd thought of it!

Hope this helps Gabi!  Anybody with more ideas, please feel free to share!

Sunday

Chicken Broccoli Casserole

Years ago, BWF (Before Wheat Free), one of my favorite recipes was Chicken Broccoli Casserole.  You may have a similar recipe, made with chicken and broccoli (duh) and topped with Campbell's Cream of Mushroom soup mixed with some other ingredients.  Back then I discovered that I liked it even better made with Campbell's Cream of Chicken and Mushroom Soup.  Then came the need for a gluten-free diet, and both soups had wheat flour in them, as well as every other brand of mushroom soup that I could find.  I made one attempt at making it with a homemade mushroom soup, but it was waaaay too much work, and didn't taste the same, so goodbye to my favorite casserole.  I never forgot about it, though, and hoped that someday I'd find a brand of mushroom soup that was made without wheat.

A little over a year ago, I heard that Progresso was making a mushroom soup that didn't have wheat in it!  I rushed off to the store to buy some....and couldn't find it!  In fact, I couldn't find it at any store in town!  So I contacted the person who had told me about it, and she bought some for me in her town and delivered it the next time she visited.  Hooray, I could make my favorite casserole again!  I immediately bought some chicken and broccoli and in my haste put it together without looking at the recipe, thinking I'd made it so often that I would remember how to do it.  Not!  For starters, I neglected to notice that the Progresso soup was not a concentrate--it was ready-to-eat.  Secondly, I had forgotten a couple of the ingredients that were supposed to be added to the soup, and thirdly, I had forgotten that the broccoli was supposed to be steamed before putting the casserole together.  I won't even begin to describe what the resulting dish looked like.  Suffice it to say that it was disgusting looking and totally inedible.  I was so disappointed that I didn't try again for about a year.

About two months ago I decided to give it another try.  I found my old recipe, and began working on solving some of the problems, like getting the soup back to concentrate consistency, and adding the chicken flavor I liked so much.  It wasn't all that hard, once I was working from a recipe (what a surprise), so here it is for you in finalized form, just as yummy as ever:

Chicken Broccoli Casserole

1 can (18 oz) Progresso Creamy Mushroom Soup
2 Tbsp. cornstarch
1/4 Cup cold water
1 tsp. Better Than Bouillon Chicken Base (or 1 bouillon cube)


Put soup in saucepan.  Mix cornstarch and cold water together in a bowl.  Stir into soup along with the bouillon.  Heat, stirring constantly, until thickened.  Set aside to cool.

3 chicken breasts (about 1-1/2 lbs)
3 large heads broccoli

Pan fry chicken breasts until cooked through, seasoning with salt and pepper while cooking.  Remove from pan and let rest for 10 minutes.  Cut into chunks.  Peel broccoli stems and divide heads into large pieces; steam in large saucepan until just tender.  Drain well.

To cooled soup add:

3/4 Cup mayonnaise
1 tsp. lemon juice
1/2 Cup grated sharp cheddar cheese

Blend well.

In 9 x 13 glass casserole, lay broccoli pieces with heads to outside of dish, stems toward center.  Layer chicken chunks down center.


Pour sauce over chicken.


Bake uncovered at 350 for 30 minutes.  Add topping(s) if desired, and serve.


The reason the casserole dish looks green here is because I set it on a green towel to protect the counter top :)  Oops!

My original recipe suggested chopping everything up, mixing it all together, and then putting it in the casserole dish.  However, I think this presentation looks much prettier and more appetizing.  I sprinkled a little grated cheese over the top after it came out of the oven just for decoration.  You could also saute some small sliced brown mushrooms in a little butter and sprinkle them over the top for a great look and added flavor.  Another nice topping is some bread crumbs lightly seasoned and browned with melted butter in a pan and then sprinkled on top (remember those failed bread loaves that you made into bread crumbs?)  Let your creativity run wild!  This is a lovely dish that you can serve with pride to guests, and I guarantee they'll ask you for the recipe!  If they don't have to eat gluten free, simplify it for them with 2 cans (10-3/4 oz) Campbell's Cream of Chicken and Mushroom Soup in place of the first four ingredients and increase the mayonnaise to 1 cup.  Enjoy!

Friday

Chicken Wild Rice Soup, rice flour as a thickener

I don't know what your weather has been like lately, but here it's been typical March -- a couple of warmer days to make you think that spring is finally almost here, and then back to winter!  These last two days have looked good (read sun is shining), but when you go outside, there is an arctic wind blowing and the temperature is maybe 23.  Brrrrr!  When it's like this, I always want comfort food -- you know, like hot homemade soup.  So today I thought I'd share with you one of my favorite soups.  I actually have several similar recipes for Chicken (or Turkey) and Wild Rice Soup, but my favorite one was sent to me by my friend Kayce.  I have adapted it to be gluten free.

Chicken and Wild Rice Soup

4 cans (14-1/2 oz) Swanson's Chicken Broth
2 Cups sliced carrots
1 Cup sliced celery
2/3 Cup sliced green onions
2/3 Cup wild rice
1 tsp. dried thyme
1/2 tsp. pepper
3 Cups chopped, cooked chicken or turkey
4 Tbsp. butter
6 Tbsp. brown or white rice flour
2 Cups milk (I use 1 cup evaporated 2% milk and 1 cup water)

In large pan, mix broth, carrots, celery, onion, uncooked rice, thyme, and pepper.  Bring to a boil.  Reduce heat.  Cover and simmer for 50 minutes or until rice is tender.

Melt butter in sauce pan.  Stir in flour and cook 2-3 minutes.


Stir in milk all at once.  Stir constantly until thick and smooth and bubbling. 


Slowly add to vegetable/rice mixture, stirring constantly.  Stir in chicken or turkey.  Heat through.  Makes about 2-1/2 qts.


Doesn't that just make you feel cozy?  The perfect antidote to cold weather.


If you can't have the milk, just add another can of broth to the roux and proceed as usual.  The soup won't look creamy, but it will have a nice texture to it.

The original recipe called for regular flour as the thickener, of course.  Happily, rice flour thickens just like wheat flour, in the same proportions, so you can use any of your recipes for gravy, white sauce, etc. and just substitute rice flour for the wheat flour.  Most recipes that begin with a butter/flour roux say to cook them together for about 1 minute and then add the liquid.  I've found that when using rice flour, it helps to cook them together longer -- 2-3 minutes -- before adding the liquid.  If cooked together for only 1 minute, you will detect graininess in the finished product, but it will be nice and smooth if you cook it longer, and no one will ever know that you used rice flour instead of wheat!

Wednesday

Bread Recipes

OK, time for some bread recipes!  Both of these are designed to be made in a bread machine, which will simplify your life a lot, so I hope you have one.  I got the first one from my friend Geri who has 10 kids and feeds her whole family gluten-free!  She's an inspiration to us all!

Favorite White Bread (tastes similar to English Muffin Bread) 

Beat liquid ingredients together and add to the mixer first:
3 large eggs
1/4 Cup oil
1-1/2 Cups warm water
Combine dry ingredients, then add on top of liquid in mixer:
2-1/2 to 3-1/2 Cups white or brown rice flour
1/2 Cup potato starch flour
1/2 Cup tapioca flour
1/3 Cup cornstarch
3 Tbsp. sugar
1-1/2 tsp. salt
1 tsp. baking powder
1 Tbsp. xanthan gum
1/2 Cup dry milk
Make a well in flour mixture.  In well put 2-1/2 tsp. dry yeast.

Set machine to normal/white cycle, select desired crust color, start machine.  After mixing for a few minutes, use a rubber spatula to scrape sides (additional rice flour can be added a little at a time if it seems too liquidy).  When done baking, remove from machine and cool upright.


Isn't that a pretty loaf?  You'll notice the tops on both loaves are flat, compared to bread done in an oven.  I'm not sure why that happens, or if it's just my machine, but it doesn't affect the taste at all, thank goodness.  And it cuts into nice square pieces for toast, sandwiches, etc.  Gotta love those bread machines!

Note:  Set to dough cycle for pizza crust and breadsticks (makes a large rectangle pan pizza, and a pie plate of breadsticks).  Can also be used for hamburger buns, cinnamon rolls, or you can bake it in your regular bread pans in your oven.

I got the next recipe from a friend who was celiac and also diabetic.  He and his doctor developed this high protein bread to help with his diabetes.  I've tweaked it some since I got it :)  This is my husband's favorite bread.

High Protein Bread Flour Mixture

7 Cups brown rice flour
6 Cups white rice flour
2 Cups teff flour
1-1/2 Cups garfava flour
1-1/2 Cups potato starch
1-1/2 Cups tapioca flour
1-1/2 Cups quinoa flour
5-1/2 Cups potato flakes
1 Cup rice bran

Mix together well and store in large plastic container (I store mine in a Rubbermaid 2 gallon size container).

High Protein Bread (a heavy, dense, satisfying bread -- super toasted!)

Mix liquid ingredients and salt together and add to the mixer first:
4 Tbsp. (1/2 cube) butter, melted
3 large eggs
1 Cup evaporated milk
1 Cup water
1/2 Cup buttermilk
1 tsp. vinegar
1-1/2 tsp. salt
Combine dry ingredients and put on top of liquid in mixer:
3-1/2 to 4-1/2 Cups flour mixture
3 Tbsp. sugar
1 Tbsp. xanthan gum
Make a well in flour mixture.  In well put 2 tsp. dry yeast


The liquid really is down underneath there!  Put the pan back in your machine and set machine on large/dark or whatever setting on your machine cooks the bread for about an hour.  Start machine.  Add more flour a little at a time until you have a fairly stiff dough, scraping down the sides with a rubber spatula. 


When done cooking, turn out of pan and cool on a rack.


This is a very moist bread, so store it in the refrigerator.  If stored on the counter, it will mold in about 4 days.  In the refrigerator, it will keep for over a week. 


When it's done, if your loaf has caved in on the top, it needs to have more flour next time.  If it's doughy inside, it needs more cooking time.  If it's dry and crumbly on top, less flour.  If it raises too much and goes over the sides of the pan, cooler liquid ingredients and/or less yeast.  Don't worry, you'll eventually get to know how it should look while mixing in order to get a nice loaf. 

Note:  It's amazing how much the amount of flour mixture can vary depending on your bread machine.  My old machine used 3-1/2 cups; my new machine uses 4-1/2 cups.  My new machine actually has a gluten-free setting.  However, I've found that the regular bread, dark crust setting works better -- the bread has a nicer texture. 

If you have a disaster or two learning how to do bread in your machine, don't despair.  You can always make it into breadcrumbs to use in other recipes!

Monday

A Few Words About Wheat Allergy vs. Celiac Disease

Don't worry, this isn't going to be a dissertation about allergies and celiac disease.  Just more of a disclaimer.  Since my husband is allergic to wheat, as opposed to having celiac disease, I have a lot more "wiggle room" than those cooking for celiac.  Eating wheat for a person with celiac disease can potentially be fatal.  There are lots of helpful sites online with loads of information about celiac disease:  how to identify it, how to find out for sure if you have it, what foods (besides wheat and other gluten-containing grains) to watch out for, etc., etc.  With celiac, it's even best to have cooking dishes (and especially a breadmaker) dedicated to only non-gluten foods. 

With a wheat allergy, all the above is not necessarily the case.  In talking to friends who have gluten intolerance/allergy, it seems that every person reacts in different ways to different foods; what one person can tolerate, another can't, for example.  So, at least initially, it's a lot of trial and error to find out what does or does not cause a reaction.  And unless you have the type of allergic reaction that causes anaphylactic shock, while the allergic response may be very unpleasant, it's usually not life threatening.

You may have noticed in my first post that I said my husband was also allergic to milk, and then in my second post included recipes containing buttermilk.  That's because we have discovered, through trial and error, that it is just the whey in milk that he reacts to, so he can tolerate almost all cheeses (yahoo!) because the whey is removed in making cheese and he also does fine with buttermilk and canned milk used in cooked food (I have no idea why, but I'm grateful).  So there you go.  If it's allergies you're working with, you have a lot of experimentation ahead of you, but you may also have a much more lenient diet at the end.  If you have celiac disease, not so much.  One thing I've noticed is that there are very few people with just one food allergy.  If you have one, it's very likely you've got several and just don't know it yet.  So, some of my recipes may work for you and some may not, depending on your particular set of allergies.  The good news is that there is usually a substitution that can be made to make it work for you, so don't give up!

Saturday

Biscuits, Cornbread, 2 Flour Mixes, and Stocking your Wheat Free Pantry

Just to warn you -- your pantry is going to be quite different, now that you're not using wheat flour anymore.  Baking without wheat flour involves combinations of other flours to achieve a good result.  So to start, you're going to need as a minimum:

White Rice flour
Potato Starch
Tapioca flour
Cornstarch (it's used like a flour in non-wheat cooking)
Xanthan Gum

Other flours that you'll eventually want to include:

Brown Rice Flour
Cornmeal and corn flour
Garfava Bean flour (a combination of Garbanzo bean flour and Fava bean flour)--Bob's Red Mill makes one
Sorghum Flour
Potato flour (just a small amount -- it's different from Potato starch, which you'll use a lot of)

Some other items that will make your baking easier:

Egg Replacer
Unflavored gelatin
Dry milk (not instant)

Some other things you'll need that you may already have:

Vinegar
Yeast

You may be able to find all these items at a natural foods store, if you have one near you.  If not, you can find them online.  Some of the companies that carry these types of flours are Authentic Foods, Jowar, Bob's Red Mill Natural Foods, Ener-G Foods, Inc., Nancy's Natural Foods, and many more.  Oriental Food stores are often good sources of rice flours as well.  If you can find it, Superfine Brown Rice Flour will give you the most tender baked goods.  I've been having a hard time finding it where I live, but Authentic Foods makes it.

There are two flour mix formulas that I use more than any others, and always have some made up and on hand.  These are from Bette Hagman, the patron saint of gluten-free cooking.  One of her books,  The Gluten -free Gourmet Bakes Bread, has lots of mixes and recipes that are great.

The most basic gluten-free flour mixture is:  (for 6 cups)

Rice flour                   4 Cups
Potato Starch             1-1/3 Cups
Tapioca Flour             2/3 Cup

You can increase this if you want to store a larger quantity, but keep the ratios consistent, and measure carefully.  This flour mixture produces baked goods that are similar to "white flour" products that you're used to, but without the superfine flour, you may detect some graininess in the finished product.

The other flour mixture I use alot is called Four Flour Bean Mix.  For 6 cups:

1-1/3 Cups Garfava Bean Flour
2/3 Cup Sorghum Flour
2 Cups Cornstarch
2 Cups Tapioca Flour

This produces baked goods that are similar to "whole wheat" products -- heavier, denser, etc.  Because this flour mixture is higher in protein, it can be substituted cup for cup in your regular recipes with pretty good results, as long as you add about 1/2 tsp. xanthan gum per cup of flour used.  Because there is no rice flour in it, there is no graininess.  If you like a product somewhere between "white" and "brown", you can mix the mixtures. 

Here are the two quickbread recipes I promised you:

Wheat Free Cornbread

2 Cups cornmeal or corn flour (I like to use 1 cup of each)
1 tsp. baking soda
2 tsp. baking powder
1 tsp. salt
1 tsp. xanthan gum
Mix above together with whisk.  In another bowl, whisk together:
2 eggs
2 Tbsp. vegetable oil
2 Cups buttermilk
Add dry ingredients to wet -- mix gently.  It'll be lumpy.


Put into a pre-heated, greased dutch oven or cast iron skillet. 


(Just stick it in your oven while it's pre-heating.)  It will bubble up around the edges when it hits the hot skillet.  Bake at 400 until golden brown on top, about 25 min.


Cut into wedges and break out the butter and honey!  Yum!


Biscuits

2 Cups flour mix--either Gluten-Free Mix or Four Flour Bean Mix or 1 Cup of each mixture (I like 4-flour)
1 tsp. xanthan gum
1 Tbsp. baking powder
1/2 tsp. salt
1/4 tsp. baking soda
6 Tbsp. butter
1 Cup buttermilk
Mix dry ingredients together.  Cut in butter until size of peas.


Stir in buttermilk.  Add more if too dry.  Pat out to 1/2" to 3/4" thick.  Cut into rounds. 


Place on greased cookie sheet.  Brush tops with additional buttermilk.  Make about 12 biscuits. 


Bake at 450 for 15-20 minutes, until lightly browned on top.


Note:  If you are following this blog, but not gluten intolerant and want to try the recipes, I'll let you know when you can substitute regular flour for the non-gluten flours and still have a good result.  For the biscuit recipe above, just substitute 2 cups regular flour for the gluten-free mixes, and eliminate the xanthan gum.

Thursday

Welcome to The Wheat Free Life!

Hello!  Have you recently discovered that you are going to have to eliminate gluten-containing foods from your diet?  Are you wondering what you're going to eat?  Do you stand in the aisle at the grocery store staring at the shelves with that deer-in-the-headlights look wondering where to begin?  Well, I've been where you're at, so I know how panicked you're probably feeling.  About 10 years ago my husband discovered that foods containing gluten were the source of chronic health problems that had plagued him for most of his life.  Some years before that, he had discovered that he was allergic to milk (as were our five children as well, as it turned out), and so I learned to eliminate/substitute all milk products from our diet in response, which was a bit of a challenge, but not as hard as I thought it would be.  But wheat?  Good grief, flour-based products are the backbone of the American diet (think bread, pastries, pizza crusts, desserts).  So what could we eat?  There was no way I was going to fix two different meals every time I cooked -- one for him and one for me -- so I was going to be eating gluten-free too.  Big-time panic set in, along with an overwhelming desire to stick my head in the sand and leave it there until the problem went away.  No way did I want to re-learn how to cook again!  However, it's cook or starve, so I started again.  At that time there was very little information about gluten intolerance, very few gluten-free products on the market (all of which were very expensive and none of which tasted better than cardboard), and only one (one!) cookbook on gluten-free cooking.  It was a steep learning curve, but we both survived, and now I can help you to survive too.

So, let's start with your most pressing question -- what the heck do I eat, starting with my next meal?  Bread and all related foods are out, most soups are out, wheat flour seems to be on every label -- AAACCCKKK!  To start, and to get you through until you can stock your pantry with the new ingredients you're going to need in your wheat free life, just think simple -- fruits and vegetables simply prepared, lean meats without sauces or gravies, and whole grains (except wheat, oats, rye, barley, spelt, kamut, and triticale -- they all contain gluten).  Sounds like the latest healthy eating plan from your favorite magazine, doesn't it?  Guess what?  It is! If you're a soup fan, be sure to read the labels -- they're getting better at specifying what thickener has been used, but if it isn't specific and you're not sure, pass it up.  Until you get a bread maker (and you'll want one, because commercial gluten-free bread is still pretty dismal tasting and very expensive), if you want a sandwich, just use romaine lettuce leaves as the bread -- just put your normal fillings between the lettuce leaves and enjoy!  I've discovered that I prefer sandwiches this way now - the filling flavor really stands out when not obscured by all that bread.  This works great for lunch meats and cheeses as well as tuna salad, egg salad, etc.  Plus, it's lower calorie, if you're watching your weight!  Bonus! 

In the next blog, I'll give you a list of things to start buying for your pantry and a couple of easy quick-bread recipes to get you started.